


Hi readers!
Okay, I need a better name for y'all. "Hi Readers!" sounds dorky. And yes, I said y'all. I'm from Texas.
I can't always come up with clever, witty, genius things to write, so when Natalie asked me if I'd like to do a blog swap with her, I happily accepted. She's adorable, and sweet, and is sharing a rockin' tutorial with us today.

Hello, there! My name is Natalie and I do a creative blog called Corduroy Dreams. I am a full-time mom to 2 beautiful children who I love and who inspire me everyday. I have the best husband in the world, and I am admittedly a terrible housewife. ha ha. I would rather do other things than clean my house... Who can blame me?
I'm so lucky to be featured on Jen's blog today. I fell in love with her paint chip wall art, and I'm planning on making one soon! So cute!
Valentine's Day is coming soon. That's what they say, anyway....
I first saw these little crepe paper rose thingies made by Shelley at House of Smith's. She did an amazing job at teaching me how to make the little roses, so now I want to show you how I took her tutorial and made my very own Crepe Paper Rose Wreath.
Wanna make your own? Here's how.
You will need the following items
Ribbon {about 2 feet}
Glue gun and TONS of glue sticks
A Styrofoam wreath {found mine at the dollar store}
Crepe paper {I used 1 1/2 rolls, also found at the dollar store, 2 rolls for a dollar. Score!}

The dollar store didn't have any Styrofoam wreaths with rounded edges, and I wasn't going to run all around town to find one, so I made due with this one.

I cut my crepe paper into strips about 2 feet long.

Then I crinkled them all up.

Start making your roses by rolling your crepe paper really tight at first.

Keep rolling it up, but start twisting your crepe paper. I found that the tighter I rolled it and the more I twisted, the better I liked my roses.

Once you've rolled it all up, hot glue the end down.
{Yes, this was my first rose, and yes, I know it looks like junk. Trust me, they got better as I went along.}

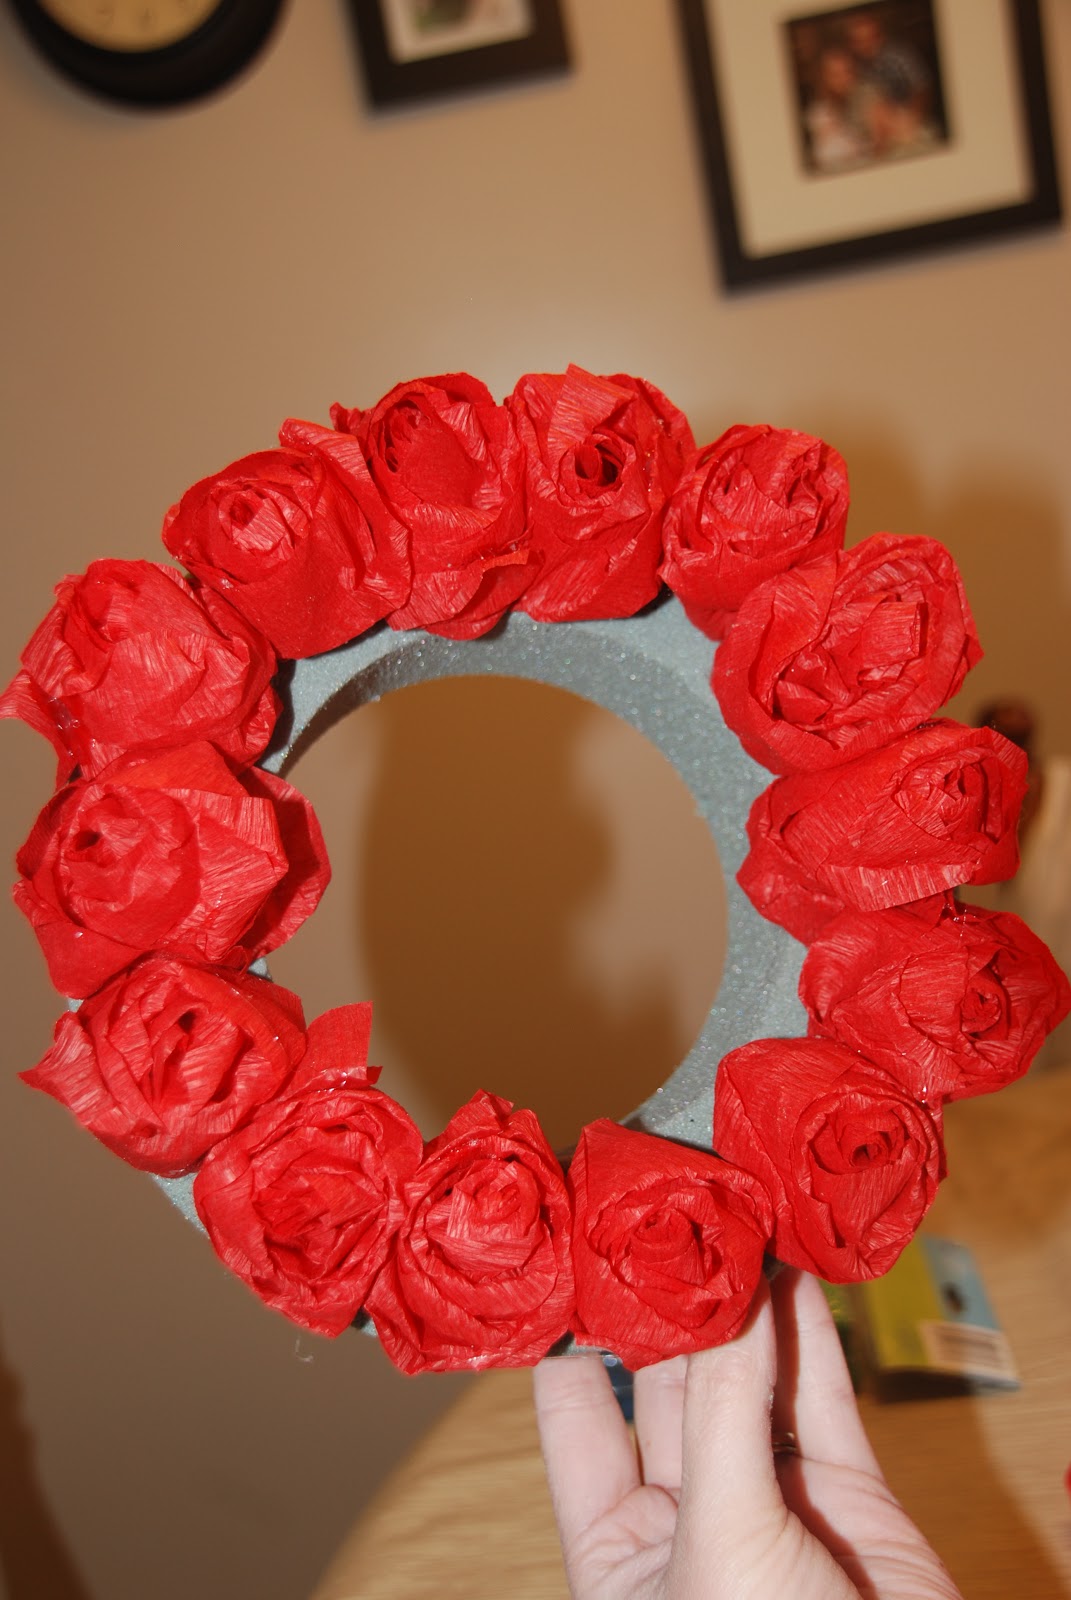
Make all of your roses before you start gluing them on your wreath, because as I said, they get better as you go. So then you can put the prettiest flowers on the front. But, honestly, once they are all on the wreath, you can't tell which is which.

Start gluing your flowers on the wreath. I found they stayed on better if I put the glue on the flower, then stuck to the wreath. {instead of putting glue on the wreath then sticking the flower on.}

Keep gluing them on.


Take a break for target practice.

Once I got all the roses glued the the front, I started gluing them on the corner/edge. I ended up doing 4 rows of flowers. The front, the side, and then right on the outside and inside edges.
I'm not sure the best "technique" for this, but I just tried to smoosh my flowers as close to each other as they could get.
I'm not sure the best "technique" for this, but I just tried to smoosh my flowers as close to each other as they could get.


Once all of your flowers are on, you can hook your ribbon on. Or, if you wanted, you could probably do this BEFORE you put the flowers on, but let's face it, I didn't think about it.
I found a spot that looked kind of bare and that's where I hooked my ribbon on.


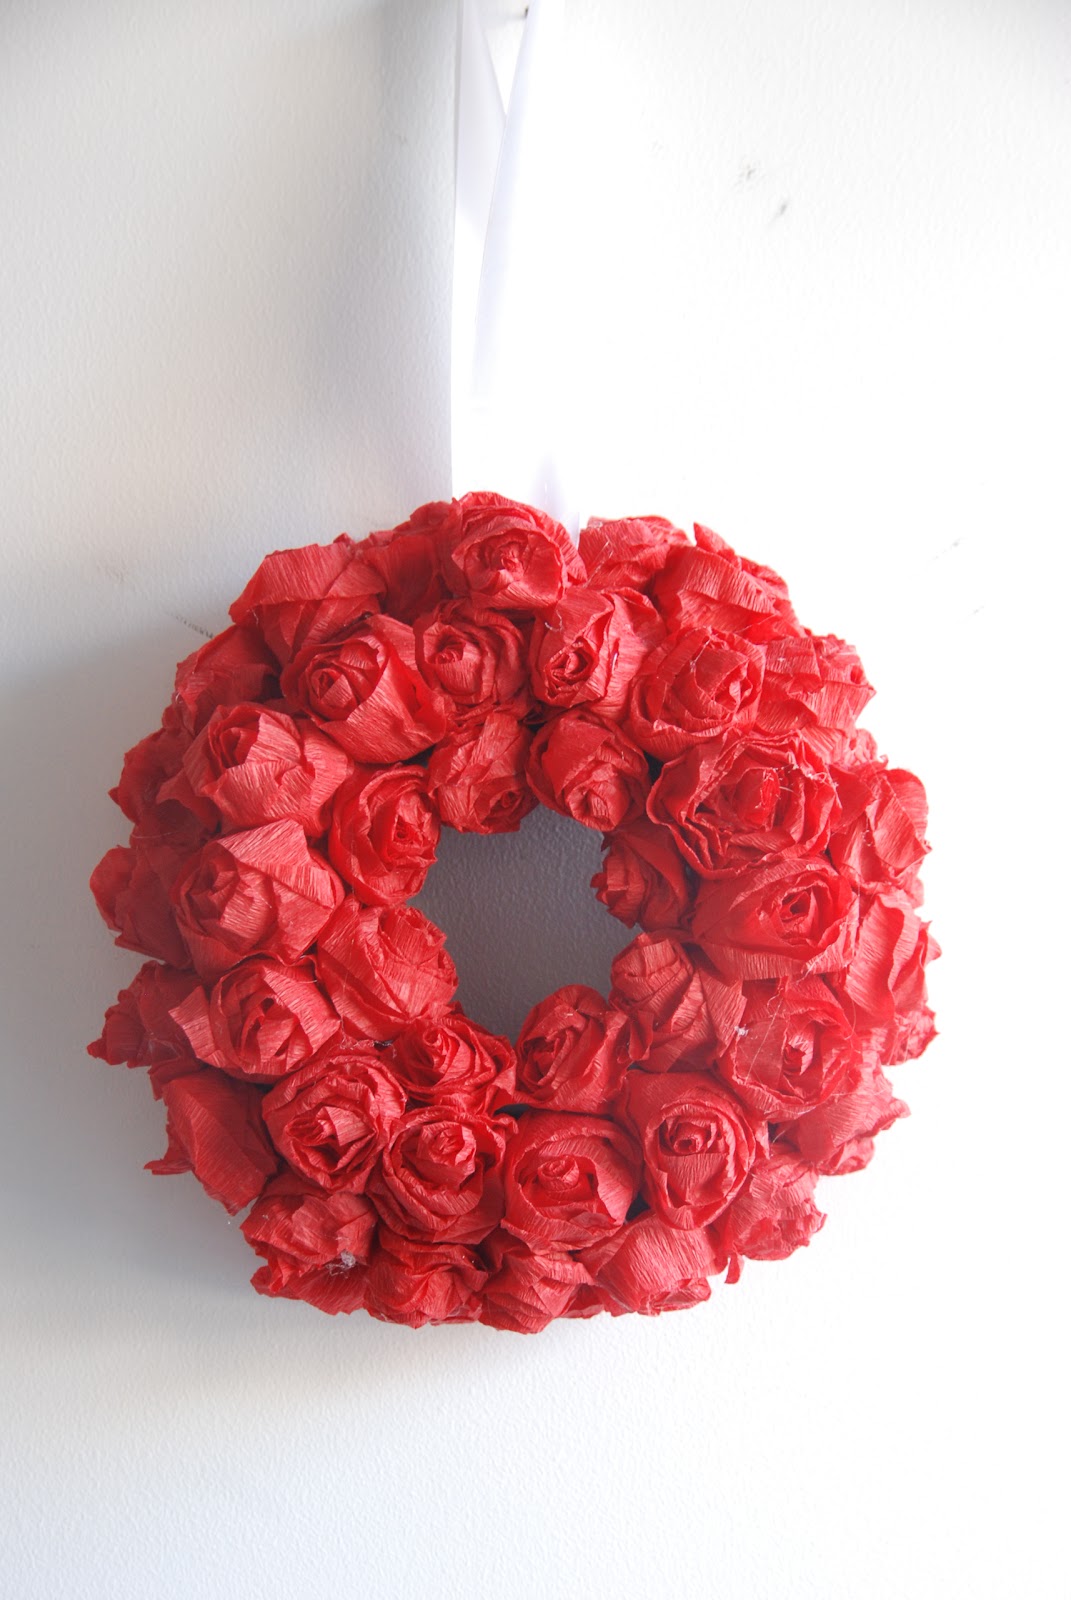
Hot glue your ribbon to the back too. This is how you're going to hang your wreath, so you want it to be a big loop.
{you may notice that I didn't put flowers on the back. Really, no one is going to see it. And I wanted it to lay flat.}

Then I hot glued a flower on top of my ribbon so you couldn't see where I attached it to the wreath.


Tah-Dah!


I used 57 flowers. It took me about an hour and a half. And cost me a total of 2 dollars {I already had the hot glue and the ribbon}.
It's been so nice visiting with you here at Jen's place. Please feel free to stop by and "follow" my blog Corduroy Dreams.


6 people love me:
I love this wreath. I actually have it bookmarked to try it. I'm about to jump over there and follow Curduroy Dreams.
Awesome tutorial! I'm going to make mine in white, pink and yellow for spring.
LOve this wreath! I have to make one :)
Looks great...and easy too! My kind of project!
I noticed on Five Seconds from Crazy that you're in the DFW-area! We are too! Are you on Twitter? I'm working on a list of DFW bloggers...@LinInOrbit.
I'm here from Crazy's blog after reading about you and finding you very interesting.
I adore this wreath; thanks for sharing.
CJ xx
Hello! I wanted to let you know that I have awarded you the “Versatile Blogger” Award as well as the “Stylish Blogger” Award. You can find both, as well as the instructions at my page,
http://wethreedyes.blogspot.com/2011/02/im-so-versatile.html
Keep up the good work!
Cheers:)
Courtney
Post a Comment