


I've been seeing all these awesome versions of subway art on different blogs, google, etsy, etc. Jen at Tatertots & Jello did some really cute ones for Valentine's day.

But most of the ones I've been seeing involved vinyl cut from a Cricut or a Silhouette machine. Well, I don't have either of those, so here is my solution.
I stopped by Walmart, and picked up a wood board in the craft section for $4. I sanded off the rough spots, and spray painted it pink, since I knew Miss E's room was mainly pink. I wasn't worried about the center of the board having good coverage, since I knew it'd be covered up anyway.

So while that was drying, I hopped onto photoshop, and with the dimensions of the board, I took the birth information (name, weight, length, date, time), and added some cute sayings that I knew they'd love. Then it was just a matter of playing with fonts and sizes (combined with a few questions to my graphic designer hubby for a second opinion).

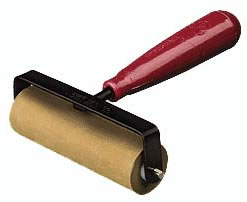
So I had hubby print it out, and I used my trusty mod podge to attach it to the front of the board. I'm not cool enough to have a brayer yet, so I just put a sheet of wax paper on the front, and used a rolling pin to work out all the bubbles. Worked pretty well, although I'll probably pick up a brayer with this weeks 40% off coupon at Hobby Lobby, just so hubby stops giving me dirty looks when I use kitchen tools for my crafts.

That was originally my plan, the painted board and the paper. But after looking at it, I thought it looked too plain. Then I remembered these scrapbooking decals that my friend Heather sent me. I double checked the pic that Miss E's momma sent me of the bedding, and saw that there were touches of green in it. So I picked out the green scrolls, and played around with those.

And had hubby give his second opinion again for decal placement.

And then, decoupaged those down, and put a few coats on top of everything. I then used a green ribbon and attached it to the back so it could be hung on the wall.
This was a super easy project that cost me under $5 and just a little bit of time. And you won't have to worry that someone else already bought them the same thing.
Miss E's parents loved it, which is always the best part of any gift. Welcome to the world, Miss E! You lucked out with some pretty awesome parents.

Linking up to


18 people love me:
it turned out so great!! I love the color that you used. Beautiful job!
oxoxox
Jen
I heart this so much! I love all the crafts people do with the silhouette machine, but i DON'T HAVE ONE :) You are so good at recreating on a dime!! I always end up spending way too much money on my projects. I love how you got J involved too!
You did an absolutely amazing job. What an incredible gift. You are very talented. Thanks so much for stopping by my blog and inviting me to check out yours. I am your latest follower. I would love if you would come and follow me back. Looking forward to keeping up with your blog.
You can't even tell it's not made with vinyl. Plus it's way cheaper than vinyl!
I'm your newest follower. I'd love for you to follow me back!
http://theloops13.blogspot.com
Thanks so much for coming by and visiting me! I just love your blog and your have done some really cool projects! I will be keeping up with you! Best of luck!
Lacy
So pretty :) Love all the little sayings on it. Thanks for stopping by my blog, I hope you'll visit again-especially on my weekend linky party :)
I love it! What a very thoughtful and fabulous gift!
adorable! I did have a question, when you printed it out, the document had the pink background, right? you just had to match the paint with the background of the subway art? looks great!
@Anonymous
I completely lucked out. I actually made the piece on photoshop before I painted the wood. When I made it in photoshop, I made it with a pink background with white letters, and I made it to the size of the wood, minus a quarter inch (so a tiny bit of the wood would show on the front). But since they ended up being exactly the same color, you can't really see that part. You could always do a different color instead of trying to match. Or maybe paint the wood, do a piece of scrapbook paper on the front, and then your subway art piece on top of the scrapbook paper (basically cut out around the words instead of leaving a 1 inch border like I did, so you'd see the scrapbook paper as a border. I plan on making one like that this week, I think. If I do, I'll do a post about it too). Hope this helps!
This is adorable. The decals added the perfect touch. This is a dumb question...but...did you print it out on pink paper? Ok, I'm pretty sure you did, but I wanted to check! Duh...sigh. It's late. I'm sorry! ;)
it turned out great! what a great gift, i bet they loved it! i really want to make subway art... thanks for the tutorials and links!
BEAUTIFUL, I love it, and especially since you showed us, who are not lucky enough to have sillouets, and vinyl a way to creat awesome art too.
Come link this up to my party **Amaze me AUgust**, It turned out really awesome, and I'd love to have you!!!
Bella :)
Yay! I don't have any of those other tools either, so it's nice to know it's possible to do without them =D
It turned out darling! I love how you showed it is possible to do subway art without a machine.
This is so cute! I am adding this to my list of projects! Thanks for stopping by my blog and I am a follower of yours now too!
i love that your hubby helps you, mine won't to save his life. he's afraid we'll fight. so we don't do a lot of projects together. lol
I love this! So cute. I posted it on my blog today:
http://itssewforyou.blogspot.com/2011/01/projects-i-love_28.html
What a sweet gift! Looks great! I am a big fan of these mod podge projects as I don't yet have a silhouette either! Thanks for linking up to Gettin' Krafty With It!
Post a Comment