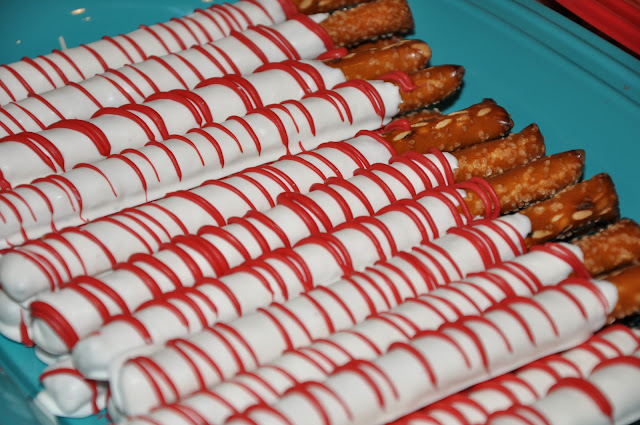
This year, I'm making dipped pretzels for their Christmas gifts. My bloggy buddy Julie at It's Sew Stinkin' Cute showed me how to make these. She said that at a bakery near her house, they sell these things for $1 a rod. Holy crap! I can make like, 30 of these for under $10.
Now, this is the lamest tutorial ever. Like, as in, no pics. I made some of these bad boys yesterday, and I had every intention to take pics. But it's impossible to take a pic and make these at the same time. So we're going to use our imaginations, mmmkay?
Things you need
Pretzel rods, duh. But I didn't get the Snyder's ones. I'm totally cheap and went with the Walmart brand in the white bag. Tastes just as yummy, and they were around $2 a bag.
TIP: take your time and go through the bags, find ones that don't have a ton of broken rods. Although hubby likes when the bag has broken rods, cause the gets those ones.
Get ya some of these. I've seen these at Walmart in the cake decorating/party section, and I've seen them at Hobby Lobby too. The ones I'll picture at the end were made with red and white. The ones I'm making for teachers gifts are white with red and green drizzles. Ya know, for Christmas.
I know some people use almond bark for the white part. I looked up online about using white chocolate, but apparently it's tricky to use, like it doesn't melt or gets all goopy, so I didn't want to deal with that.
You will also need a bowl to melt the wafers in (I like using my big measuring cup), a spoon, some wax paper and a cookie sheet.
The process
First step is take some of the wafers, place them in your bowl, and place it in the microwave. Nuke it for no longer than 30 seconds, stir it, nuke it for a few seconds more, stir it, and so on and so on until it's all melted and easy to stir. I like to add a splash of vegetable oil (NO water, it'll ruin the consistency) in the bowl to help it be more smooth. Don't just nuke it without checking and stirring it, it is possible to over cook these.
Once those are all melted, place the pretzel rod in the bowl, take your spoon, and spoon the melted candy over your pretzel rods until they are mostly covered (leave a couple of inches on one end uncovered so you can hold it). When it's all covered, I like to shake it up and down to get some of the excess off (do this over the bowl, duh). Then place it on the wax paper, which you have laid on your cookie sheet. If you are going to do sprinkles, do it at this time before the candy has dried.
Keep repeating this until all of your pretzels are covered. To speed up the cooling process, place the cookie sheet in the fridge for 10-15 minutes.
To do the drizzled colors, you just repeat the above process. But instead of spooning the mixture over the pretzels, I placed it in a ziplock bag, snipped the tip off of one of the corners, and squeezed it out over the pretzels. Bloggy buddy Julie uses a squeeze bottle for this part.
I did let the red candy harden before I did the green on the teacher's gifts, so the colors wouldn't mix.
And voila! It's all done. We made these for Ava's birthday party, and they flew off the plate. Let me know how they turn out if you make them!


5 people love me:
Irk! I am sooo making these for my kids' teacher! I know she'll love 'em!
Cute, quick and cheapy. That's my kind of gift! I think my neighbors will be getting these this year. Thanks so much for sharing!
Wow, you like some super awesome baker :) If these are half as good as your cookie then I'm sure they rock! Great idea, I think I will make some as neighbor gifts.
These look awesome and are so easy!!! Great neighbor gift!!
http://sincerelyarizona.blogspot.com/
I made these and they are awesome! Thanks for suggesting candy melts. I would have used white chocolate and it probably wouldn't have been as easy to work with!
http://thejunkhouse.blogspot.com/2011/12/sugar-sugar.html
Post a Comment