


This is one of the newest projects I did for our house. I get a bit antsy if I'm not able to craft, I think it's soothing to make something pretty. Especially when someone comes in the house, comments on something I've made, and asks me "Where did you buy those at?" Best. Compliment. Ever.


This project took a while to complete. Not because the project itself took a while, but it took a while to get all the letters. I got all of these letters at my favorite store, Hobby Lobby. Each letter was $2.47. I refuse to pay that much, since it would have cost me over $30 on just the cardboard letters. Not including the money on the scrapbook paper, and the wooden boards I have it all attached too. I'd be looking at a $40 project, and that just won't do.
We all know that Hobby Lobby gives a 40% off one item coupon every week. You can use "one coupon, per customer, per day." So I would pick up one during the day, and then text my hubby and tell him what letter to pick up on the way home from work. With tax, each letter cost me $1.60. So I saved about a buck per letter, and $12 over all. Not too shabby. I think I ended up buying 7 or 8 different types of scrapbook paper. And if I planned it out right, I was able to use one 12x12 sheet for 2 letters. Oh, and for those of you with smartphones, if you forget to print out your coupon, you can pull up the coupon on your phone, and get the 4 digit number off of it and give that to the cashier for your discount.
The first thing I did was put each letter, face down, on the back side of the scrapbook paper I had picked out. I then traced around each letter. Then I put the paper to the side. Now, the in progress pictures are not my kitchen project, it just the same process. I didn't take pics of my kitchen project, I did those a couple of weeks ago before I decided to check out the loveliness that is blog-land.

This picture shows a letter traced on the backside of scrapbook paper, the letter on the right is after I cut out one of them. These letters are going in my baby's room, she has a safari theme in there.
So, now that we've traced out all of the letters, and put that paper to the side, we need to work on the the cardboard letters. You might like the look of the cardboard. I wanted it to match my kitchen better, so I picked a pretty brown color. You just need to paint the sides, and edges of the front (you paint part of the front in case the paper doesn't cover it all the way. You don't want to have a pretty color on the sides, and see the cardboard on the front).

No, I'm not doing purple with the monkeys. This is a letter that I'm working on for my oldest daughters room. We're doing a section on her wall with different A's. I didn't paint the sides of the monkey letters, I thought the wood worked with the paper. And yes, I know, that these are not the same letters as my cardboard kitchen ones, but the process is the same. On my kitchen letters, I wanted more depth, so I took a paintbrush with a little bit of cream paint on it, and lightly brushed it on the sides.

Can you see it on the sides in this picture?
So now that you've painted it, set it to the side. I just used those little craft bottles of paint you can get at Walmart or HL or any craft store for a buck. They dry really fast. If you're going to attach your letters to a board, go ahead and paint that too. I attached my letters so I didn't have to worry about spacing them out when they were on my cabinets, plus I didn't want my skinny letters (like the T) to fall over. The wood board I got at Hobby Lobby too, I think it cost me a buck? Gotta love the half off sales that HL has all the time. I had my husband space out the letters (gotta love being married to a graphic designer who knows about letter spacing and such) and then he cut the board down to size before I painted it. He always ends up with extra work when I'm doing a craft project. He never complains though.
So now we're going to cut out the letters so we can stick them on the front. I cut just inside the lines. If you cut it out right on the lines, it'll be just slightly too big for the front of the letters.

So now, you have your cut out paper, and your painted letters. I'm lame and don't have any progress pics of the next part. I always forget to take pics in the middle of my projects, just the beginning and the end. So we'll just use our imagination. First, you want to lay the paper on the letters, so you can tell if you need to trim it anymore. You'd hate to put the glue down, stick down the paper, and realize it's still a smidge too big. So once you're happy with the paper, you just put a thin layer of modge podge on the front of your letter, and lay your paper on it. I used to always have a problem with my paper bubbling up with I would decoupage, but this seemed to help a lot.

I put soda cases on my letters while the decoupage is drying. See my monkey letters poking out? (At this point, you haven't put the decoupage glue on the front of the letter, so no worries of the letters getting stuck to the soda case. I do put a piece of paper between the soda case and the letter, just in case I've been messy with the glue.
So I let that dry for a couple of hours, and then put the decoupage on the front and sides of my letters. I wanted my letters to look a bit more vintage, so when I was putting the mod podge on the front, I would add a tiny bit of brown paint to my paintbrush, and brush that on the edges.
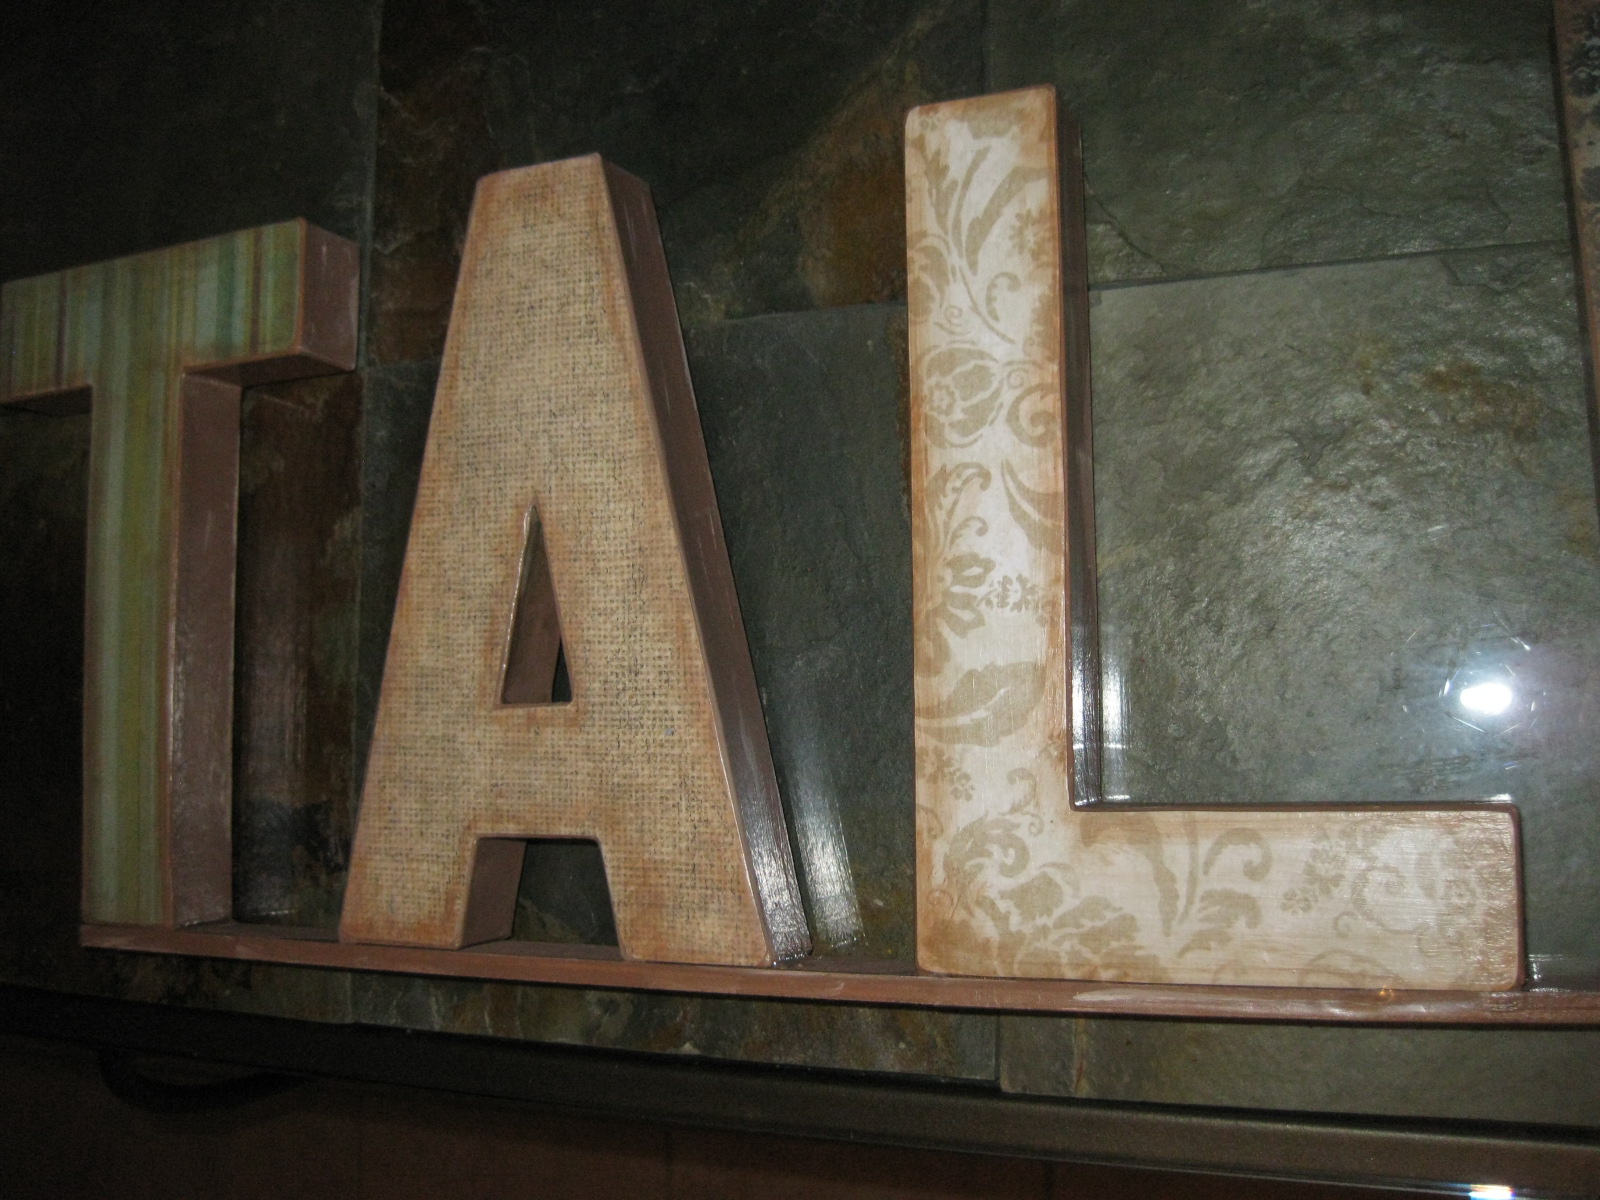
You can kind of see it in this pic. I like the dimension that it added.
At this point, I'll attach the letters to my board with some E6000 glue and let those dry. I do score/scuff up the board where it attaches to the letters, and the bottom of the letters, so the glue will have something to attach to. I did put some clear packing tape around the board and the bottom part of the letter, just for stability. I wasn't worried how it would look, since I knew it would be way high up on our cabinets. If I had to do it all over again, I would just put it under the board and up the back of the letter. But the E6000 might work on it's own, it's pretty strong (smelly) stuff.
And voila!

I did put bricks under the board when I put them up, the trim on my cabinet was visually cutting off the bottom of the letters. So the bricks propped it up about 2 inches.
My mom knew I love words in my kitchen, and bought me this at Hobby Lobby. It comes in an upper case version, and a lower case. I told her I wanted the upper case, to match my letters. My 7 year old saw it, and said "Why does it say Fat?"

So now, I don't see "Eat" when I look at it, I see "Fat". Maybe I should have told her to get the lower case. Oh well.
Linking up to these craft parties:


16 people love me:
I love it! The words and colors you used are perfect. I too have the WIDE OPEN SPACES above my cabinets {which I hate} I tried doing antiqued coffee pots {I have a coffee theme going on} but I don't love it. Your idea is awesome and looks pretty :) Hmmm maybe I could spell coffee with matching papers and colors.... thanks for the inspiration!
What a cute idea. I'll have to try something like that. I notice you're new to blogging. I became a follower. I'd love for you to follow my blog. I'm still new to blogging also and I'd love more followers :)
I love the eat/fat...hilarious...is there any wonder the too are so closely related.
I did something similiar on my sons' birthdays with numbers, and paper mached them out of cereal boxes! Sure beats paying $$ for it, right?
Following u now as well...
Hope you can link up these letters at Creative Juice Thursday!
<3
nicolette @
http://momnivoresdilemma.blogspot.com/2010/12/creative-juice-thursday-5-features-and.html
funny, i see fat too! lol thanks for entering my give away. i'm a follower of yours now too!
This is wonderful! I LOVE the paper choices. Thanks for linking up!
Welcome to the blogging world! It's tons of fun :) Thanks for the blog visit and kind comment. My sister Chelsea did a great job on her pillows. (We share a blog) Love your letters cause I'm a word, letter freak. I just bought another letter today for my craft room! Happy blogging!!
Jennifer,
Thanks for stopping by the creative mommas blog and for your comment! Welcome to blogging! I'm sure you're going to love it! Those letters look great! I have to say, the "Fat" is pretty funny! Can't wait to see more tutorials from you!
Thanks for dropping on over to You Seriously Made That! I really love your letters you made! I've been dying to make myself some letters as well, but I just can't figure out what to do...
Nice Work on yours! Love the Eat Talk Laugh. And good call on the coupons. 40% is awesome!
love the letters wanted to stop by and say hi. thanks for stopping by my blog.
Just dropping by to let you know that I linked to this post in a round up today from the Home & Garden channel at Craft Gossip. :) You can see the feature here
http://homeandgarden.craftgossip.com/9-eat-sign-projects/
If you would like a "featured by" button, you can grab one here!
http://homeandgarden.craftgossip.com/grab-a-craft-gossip-button/
you've been featured from creative juice thursday...
stop by and grab a button if you so wish!
<3
@Amanda and Nicolette, thank you for the feature! What a nice welcome for a new blogger!
very cute. i have letters like this for spring and couldnt figure out what to do on the side of them. HELLO Paint!!! yippee thanks for the idea!!
It looks awesome up there above your cabinets! Great job! Thanks for linking up to Gettin' Krafty With It!
Did you use an exacto knife to cut out the paper for the letters? I was thinking to do this project with one letter for the top of my sons Birthday cake. Thanks!!
A pretty important functions of one's kitchen are to store, prepare and cook food and to accomplish related tasks including dishwashing.whirlpool washer reset
Post a Comment